
Sidebar: I vividly remember a writing assignment in elementary school in which I needed to write about where I saw myself in the future. I revealed that I either wanted to be an actress, an archaeologist, a photographer, or an interior designer-- pretty diverse set of dream jobs, right? I still think if I wasn't teaching that I would be doing one of those things. Well, besides the acting gig. I think that ship has sailed.
Back to reality....
As I said, I began with this empty room:

Since I didn't have bedding picked out yet, I started with the wall paint color. I had pinned several color schemes on Pinterest, but ended up "copying" my sister. Which, as my mom always taught us, is a compliment. Although when I was growing up and my sister would copy me, I didn't always see it that way. ;)
After helping paint the rooms in her new house, I knew the dining room color was my favorite. It's yellow- but what I like to call a "neutral" yellow- not pastel, not a bright, sunny yellow....it's this yellow that complements other colors. So I told her I was going to steal it for my own house. Take it as a compliment, Capen.
One day....right BEFORE the Heat Wave of 2012 started (I learned my lesson from last summer), I decided that this would be the prime day to paint the guest room. I already had the paint and all of the supplies.....so I got to work- prepping the room with tarps, removing wall plates, etc.

Before-- neutral, beige walls begging for a change

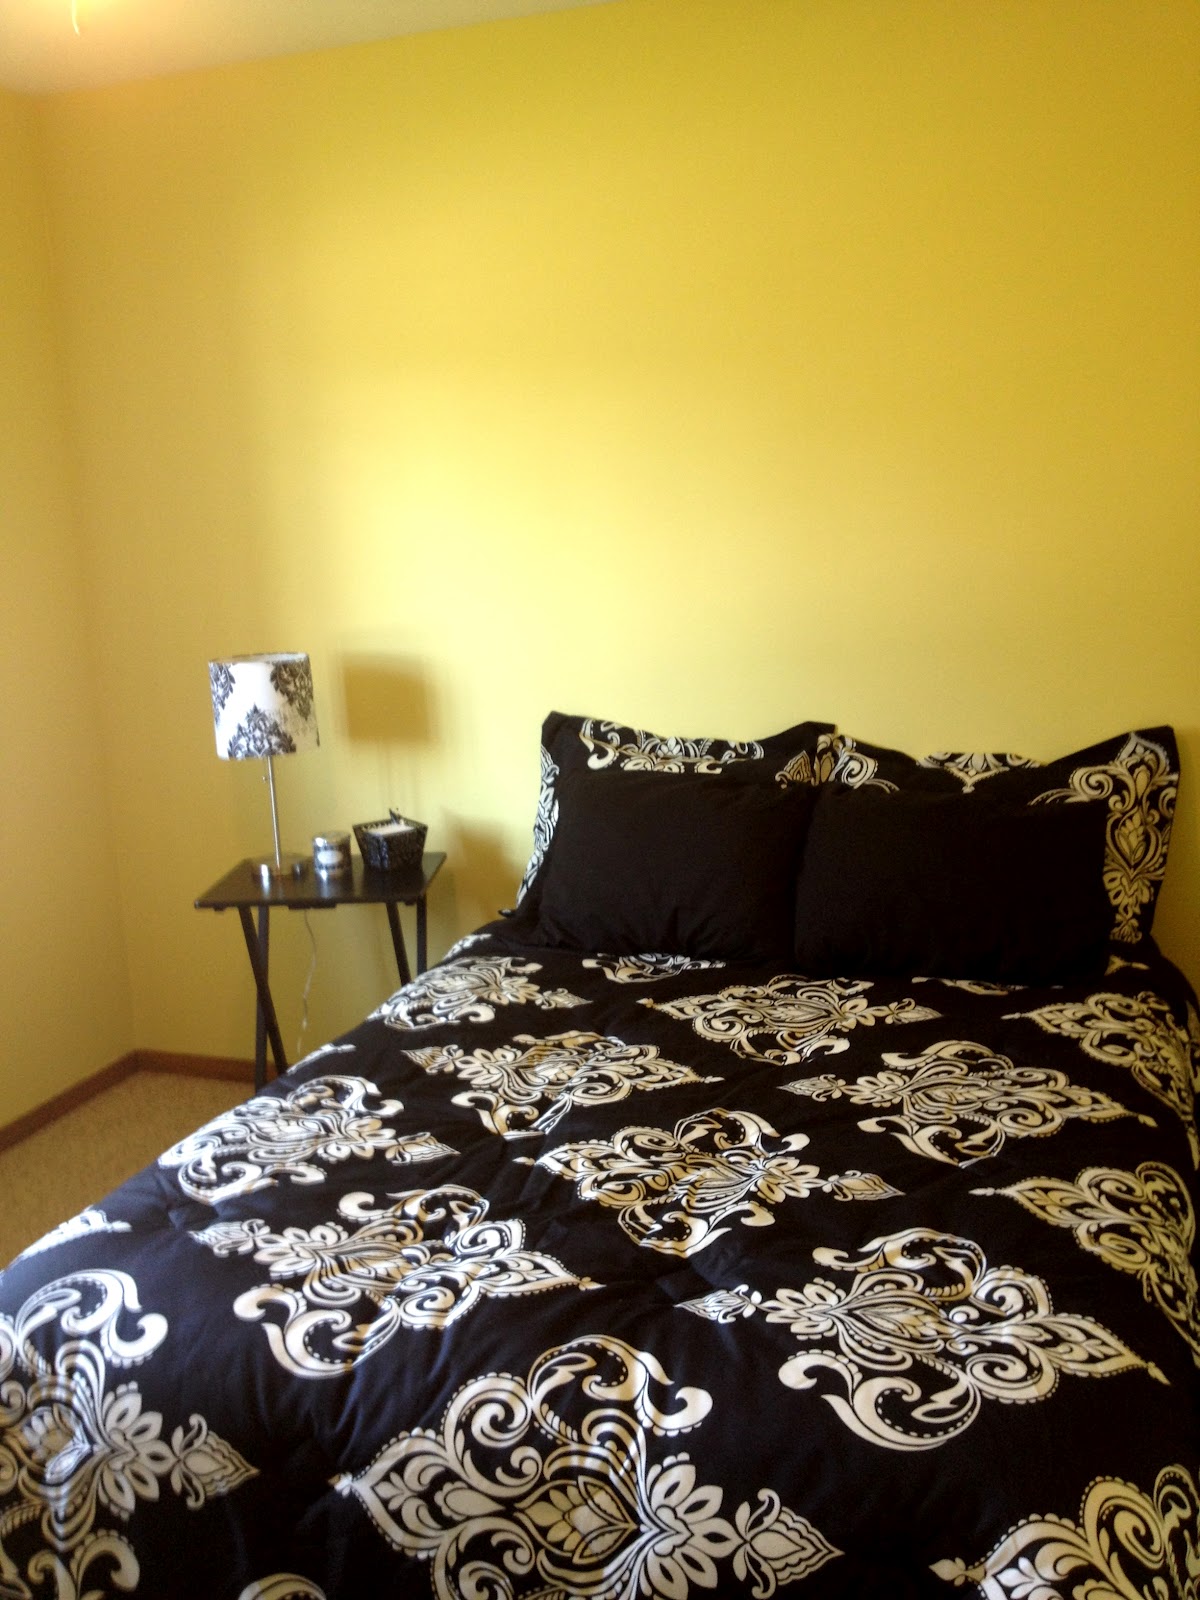
After-- two coats of paint transforms the room
From there, I had a vision of the decor in the rest of the room.....mostly black and white for the bedding and details, with a few pops of color here and there. Girly and vintage-inspired.
The bedding came first. I looked at several different stores for what I wanted, and actually found what I wanted in the place I least expected--- WalMart. So you can probably guess, it was a great price. And what I really loved (besides the pattern) is that with this being a "bed in a bag" deal, the quality wasn't compromised either. Bonus!
The black sheet set on the bed right now was bought separately before I found the comforter set, so I have an extra set of sheets as well!
As a frequent guest in other people's houses, I know how nice it is to have something....a table/nightstand/bookcase/etc. next to the bed.....with a light to turn off right before falling asleep, to set my glasses and cell phone on, etc. So of course I needed to find something for this purpose. But what I didn't want is to spend much. I had planned on scouring garage sales for something, but in the end I never needed to start that search.
Enter my favorite store-- Target-- to the rescue.

This is actually a "TV tray" table-- $9 at Target. Perfect size for a small lamp, candle, and metal basket with paper and pens. I had all of the "accessories" around the house, and have started looking for something small to add a pop of color and interest to the collection in the future.
The windows had the plain, boring blinds which are fine and functional and all that....but I just couldn't resist looking for something else to soften the look a bit. I just didn't want to spend a ton since I already bought new curtain rods/curtains for my living room and dining room.
I went with an inexpensive "cafe rod" and lightweight, sheer white curtains. It is exactly what I wanted.....something feminine, something to let light in, but still keep the privacy a bedroom should have, and of course....something low-cost.


A few other things that fill up the guest room....

A bookcase I brought up from my basement family room.....filled with photo frames and albums.

Closet is now filled with my overflow clothing (stuff out of season, rarely worn items, etc.), baskets of purses (which I pared down by about 30% after my garage sale), and a wrapping paper/supply organizer that I recently bought.

This side of the closet....more clothes, other storage baskets/bags, and my vacuum is now upstairs!
The last thing I did to the guest room is replace all of the outlets and switches. They were all beige and I wanted them to be white. Huge difference, right? ;)
Since I was already going to do this in my kitchen, I thought I'd be a crazy woman and just do the entire top floor. Someday, I'll show you why ALL of them are being replaced. A hint: wooden.
So my rockin' mom showed me how to do it with my kitchen outlets/switches, and after she had to leave that day, I decided to do all of the guest room on my own. Pretty proud girl right here.
Once you know how to do it, it's really just a few simple steps.
**What should be obvious, but needs to be said: TURN OFF the electricity BEFORE starting any electrical work**
I tested every single switch and outlet before beginning any of the steps below. This is best done with a partner, so luckily my sister was there to help with that part.
Step one....remove the old outlet or switch, leaving the wires.

Step two.....hook up the new outlet, matching the wires in the same way.
Step three.....Screw the rewired outlet (or switch) into the electric box.

Step four....attach the new wall plate over the outlet or switch, making sure everything is aligned.


Step five....turn the electricity back on and relish in your awesomeness as an amateur electrician.
So that's where my guest room stands as of now.....although I have a few small projects left in the works-- things for the walls mostly. I wanted to add some more color to the room, just a few fun bits of my personal style. A little inspiration from some antique shopping, and some ideas from some Internet shopping.....once those are added, I'll post some pictures!
Update: the third kitchen remodel post will come soon.....but I have a couple more details I needed to finish before the final reveal for this summer.....:)


0 comments:
Post a Comment